Friday 21 December 2012

One for the Season

Pesebre - Daniel Naranjo
Pesebre

Pesebre is a Spanish word that means manger. This is a quintessentially minimalist model created by Daniel Naranjo.

Paper: Copy Paper, 10x10cm (Mary and Joseph), 5x5cm (Baby Jesus)
Difficulty: Simple
PDF Diagram: available here.

Pram (Roberto Gretter)

I finally managed to track down the diagrams for this exceptional model. This is my first attempt, with an A4 sheet of copy paper. This obviously needs a much larger sheet of paper of better quality. I will attempt it again in 2013!


Classes in 2013

I plan to hold another beginner workshop in Jaaga in the second half of January 2013. There are a few people around Malleswaram who are interested, so I may start a regular weekly class too. Do let me know if anyone is interested.

Happy New Year to all of you! See you in 2013.

Wednesday 19 December 2012

Origami Owls


Owls

Of late, I have been trying to fold different kinds of Owls. There is a large variety of Origami Owl designs, and here is a subset of them.


Owl by Beth Johnson

Diagram at http://bethorigami.wordpress.com/art/designs/owl-copy/
Paper: handmade, 20x20xcm


The feathers are obtained by simple pleating in two directions at one corner, and the 3D shape is obtained by folding locks on the inside.


Hex Owl by Beth Johnson

Diagram at http://bethorigami.wordpress.com/art/designs/hex_owl-2/
Difficulty: High.

Similar to the previous one, this is folded from a hexagonal grid. The feathers are made by repeating a tessellation. One needs a large sheet to do these cleanly.


Owl by Davor Vinko

This is a more complicated design, with well designed locks to keep the model in shape. There are variations, such as the open winged model seen at the top.

Diagrams: Multiple crease patterns available here and here, and there is a video as well.


More Owls

There are a lot more of Origami owls out there. You can find some on Flickr, Squidoo, and other places.

Thursday 22 November 2012

Origami with Quilling strips, inspired by Bamboo

 Just playing with quilling strips


Origami with Quilling strips

Previously I had used quilling strips to make the traditional puffed stars.  When I visited the recent A Hundred Hands annual event, I saw some extremely delicate bamboo jewellery, and it inspired me to try more Origami with these thin, perfectly cut strips of paper.

I learned this new design from the master bamboo weavers at the event. This one is made with four strips of material. The quilling strips are about 10mm wide, but the bamboo piece was done with strips barely 2 mm wide!

And the Quilling paper version
The Bamboo version


And here is another familiar design - the Moravian Star, also made with 4 strips.

There are lots of Origami designs  which can be done with paper strips, and there are whole sites dedicated to it as well, such as the Knotology site!


And here are some more variations that I and my son came up with, using quilling strips, and based on the Bamboo jewellery design.


This one looks just like the bamboo jewellery design, but it 'pops' up!


The image at the top is much more like what 'quilling' is really supposed to be!

And finally, I am now a member of A Hundred Hands, the Handmade Collective. The list of their artist members is here.

Wednesday 31 October 2012

My first online sale!

Curly Kusudama in progress

In the last two weeks, I sold two of my Origami creations online through ItsHandmade.in, which lets individuals sell their stuff through their website. Initially I was going to ship the model I already had, made by my son, but it was a bit soiled, so I made this Kusudama ball from scratch. It uses 60 squares (10.8cm) of 6 colours, from 12 sheets of Frabriano colour copy paper. The folding time was about 3 hours. The Fedex pickup guy was on the dot, and I had to ask him to come back in a few minutes so that I could pack it in a clean shoebox!


Here is what the end product looked like.


The first item I sold was a Spiral Star (design by Tomoko Fuse), made with 4 sheets of metallic embossed paper.

Here is the link to my online 'shop':


ItsHandMade

This site was launched earlier this year, and they are based in Bangalore. Out of curiosity, I signed up and posted a couple of items, giving them an approximate price, lead time, etc. And 2 weeks ago I was pleasantly surprised to see a mail saying that I had an order! In fact I had almost missed the email as I am used to ignoring the regular updates from the site! And then the second order came, which was delivered yesterday.

I am glad to see a few other Origami items on sale at the site, such as lamps and coasters.

Thursday 18 October 2012

Origami for Dasara display


Origami for Dasara display


I am back with the blog after a long break. I have been busy teaching a student and making various models for her Dasara display. We have been doing animals such as peacocks, elephants, dogs and rabbits, decorative stuff such as Kusudama (curled, glued, etc.), Borromean triangles, etc.


Borromean Triangles

Boromean triangles have been in use for over a thousand years, and are also known as Odin's Triangles.

It consists of three interlinked triangles (sometimes rings). If any one of the triangles is removed, the other two also get separated. Because of this property, it is used as a symbol of unity and cooperation.


Enneagram

Enneagram or Nonagram is a nine-pointed star. A regular nonagram such as the one shown here is used as a symbol of the Bah'ai faith. It is constructed from three equilateral triangles.
Here is a combination of the Borromean triangles and the regular nonagram!


Back to Jaaga this weekend

I am back at Jaaga, conducting two Beginner workshops in Origami on Friday and Saturday at 5pm. Contact me at art dot folding at gmail dot com if you are interested in attending.

***

Wednesday 20 June 2012

First Commission for Origami

My First Commission!

Last week was eventful, as I delivered my first order for Origami. A designer saw my poster at Jaaga, and called about using some Origami models as the props for a brochure for children's clothing. So we spent a couple of days researching and finalizing the items, and then I spent three whole days, making a variety of flowers, fish, stars, airplanes, and fans.

The photo shoot happened last week, and now I am looking forward to seeing the brochure in print!


The flowers were mainly simplified Kawasaki roses, and a few Omuta roses, mostly in a variety of shades of pink. I also made a few Kusudama flowers, which need glue :(

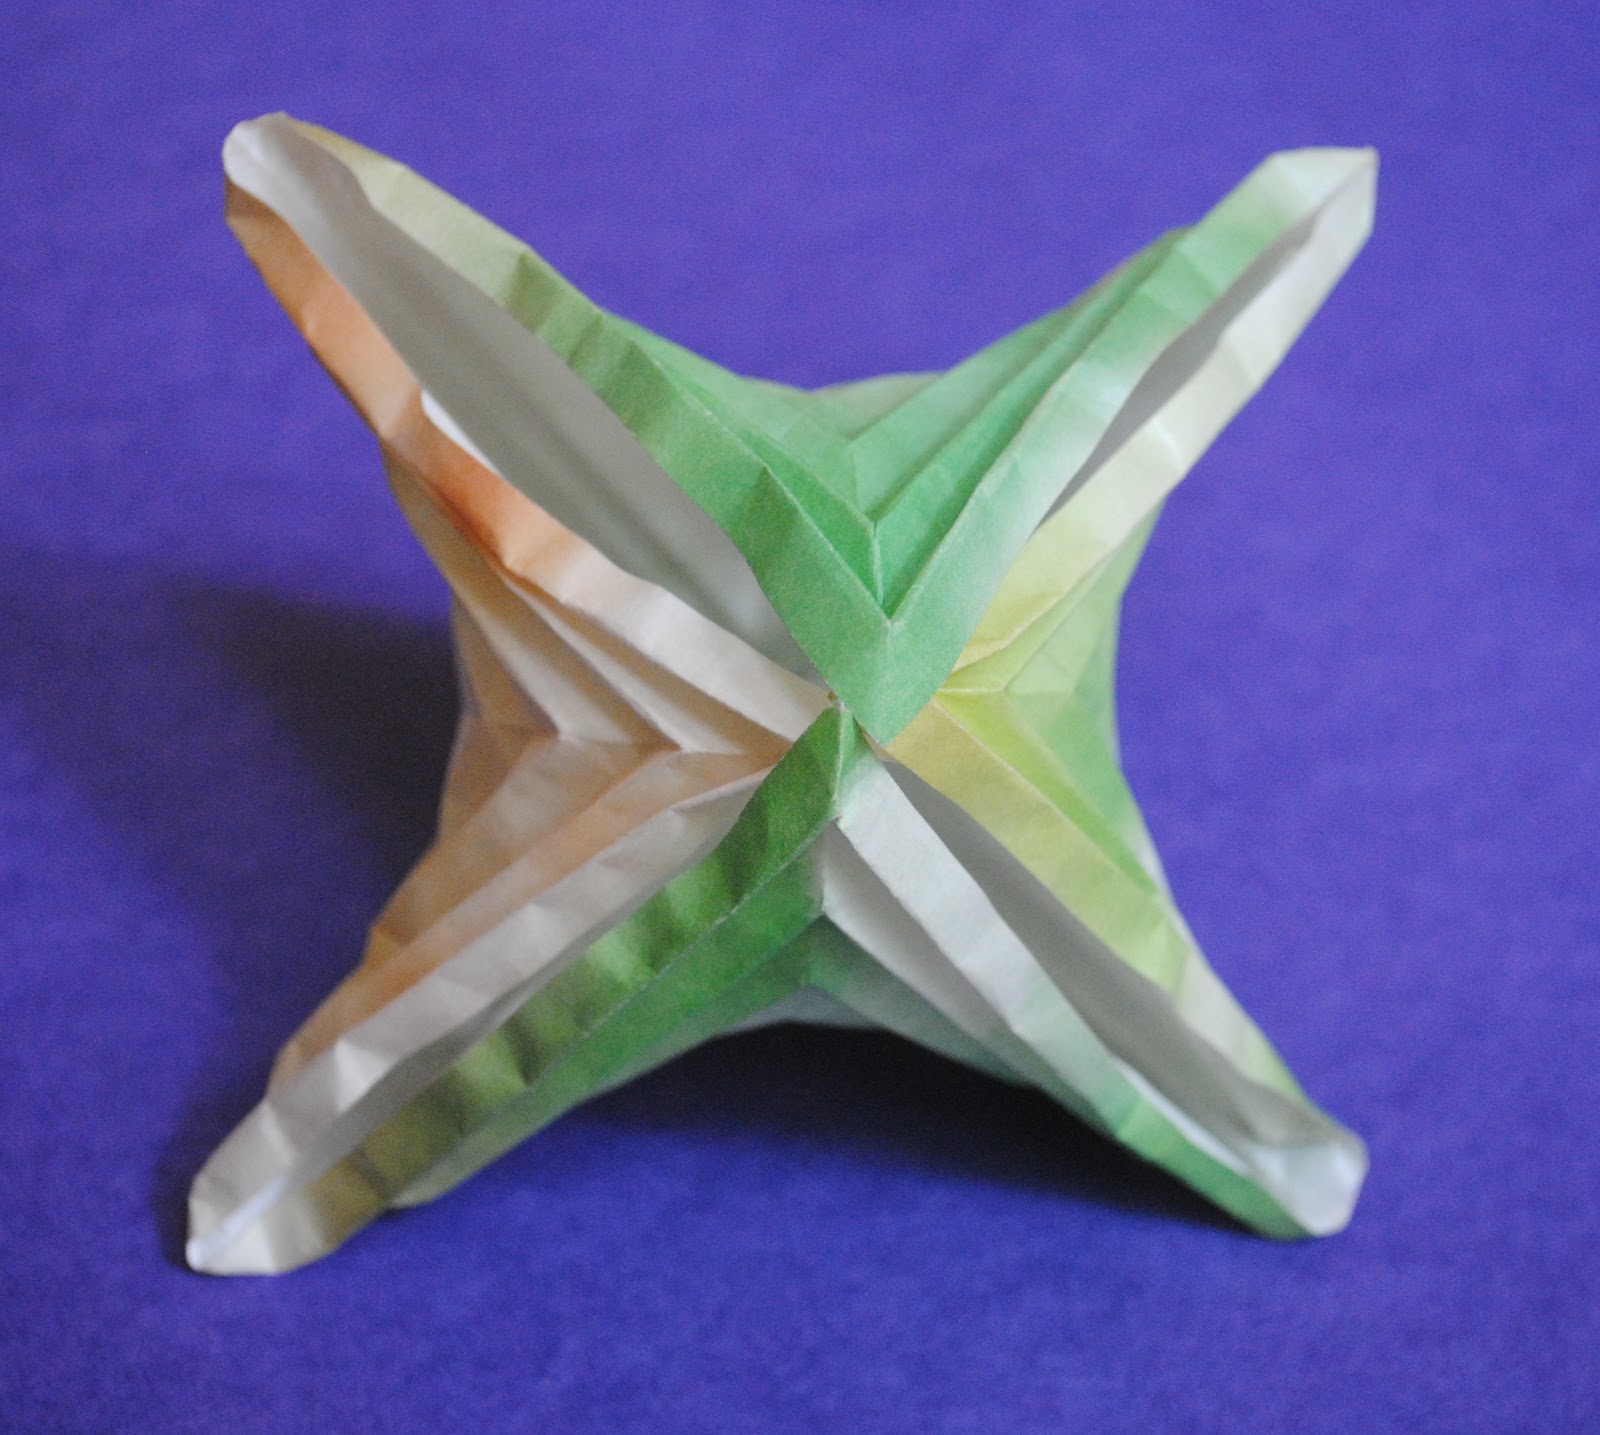
The larger, simple stars, which look like starfish, were simple pentagons with mountain/valley folds to give it the three-dimensional shape.


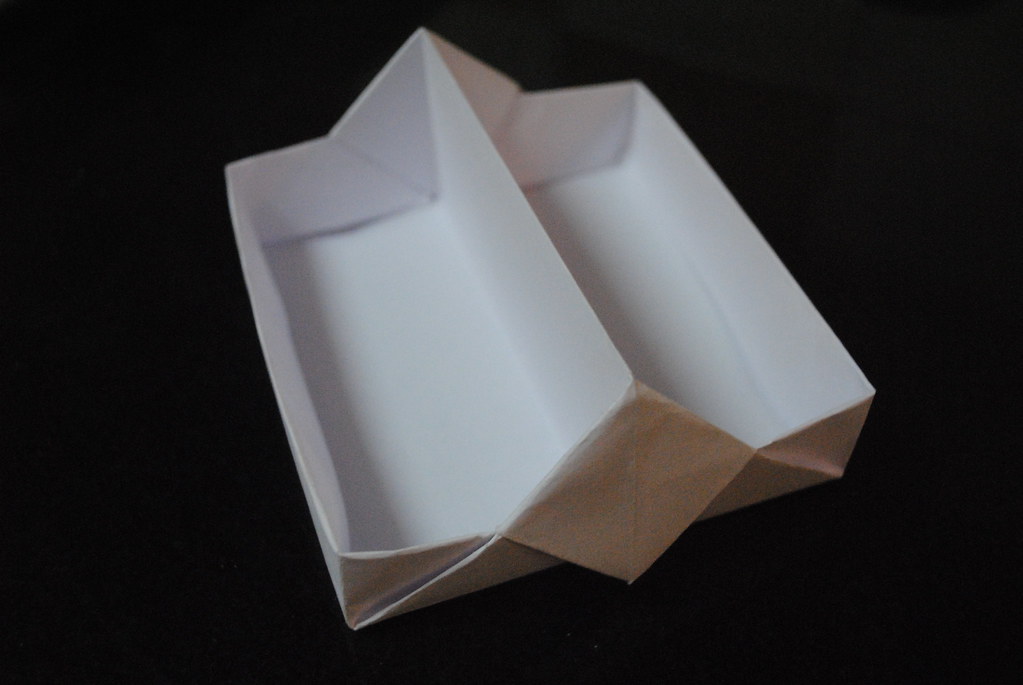
I used some "gateway" paper for the fans, which feels like tracing paper. It is almost impossible to reverse a fold on this paper, but it works alright for some simple models.

While looking for the earlier design of the Omuta rose, I found a new one, in Google books! This one is made from a bird base.

The fish models were simple, based on the windmill base.


The F14 Tomcat airplane, designed by Michael LaFosse, is a lovely design, withe video instructions online. It takes some tweaking to fly, but the folding sequence is really impressive.

Recently I made the Art-Deco Wing, also by LaFosse, and it is one of the best glider designs.


The five-pointed stars were folded from a pentagon. I found this design on a blog without any attribution. This blog itself has lots of nice ideas for pop-up cards.


Article in DNA Bangalore

And to top off the week, there was an article in DNA newspaper about I and my Origami. It was in connection with Origami workshop I did at Atta Galatta, a new bookshop and venue for art/craft in Koramangala. The report carried a couple of nice pictures of my Origami, including the traditional two-colour diagonal pleated bangle (which I made from Malabar Gold mailer envelope), bloxy (by Jo Nakashima) and the Carambola.


Here is the link to the article.

ATTA GALTTA: a new venue for Origami classes!

Atta Galatta is a new bookshop in Koramangala, focusing on regional language books. It has a dedicated space for events related to art and craft, and a bakery too is going to open soon. I have done a couple of Origami sessions, and will be conducting sessions at least once a month here.

Friday 25 May 2012

Boxes, Tetra-Pak Origami, etc.


Box with Lid, by David Brill

This beautiful design of a box, complete with a lid is from a square. The end result is a box whose size is one fifth that of the original sheet. The projecting piece of the box on the inside of the bottom fits into the lid, and keeps things neat and tight.


Video by Adams Sara on Facebook.

I got this lovely wrapping paper as a New Year gift, and it works fairly well for such models.


Lampshade 


I have been planning to do something like this for a long time, after seeing lots of such models.


It is a combination of accordion pleats along the length, and overlapped pleats along the width.

This one is from an A4 sheet of white copy paper, folded on Saturday while waiting for my weekly class to start.


Tetra-Pak Icosahedron

This one is made from 30 strips of 1x4, and 20 strips of 1x6, cut out of 5 tetra-pak juice packets. This one is too small to put a light in it, so I plan to make a bigger one.

The inspiration was this the award winning design.


 Fancy Square Box, by James Clark


Boxes are always a favourite object in Origami. This one is a nice design with a slightly difficult collapse after all the pre-creasing.


Diagrams available.


Caterpillar, by Maarten van Gelder


Starting with a 1x8 rectangle, this one involves lots of painstaking and repetitive folding, with most folds being repeated 16, 32 or even 64 times!


Diagram available.


Thursday 3 May 2012

Back after the break, with the extended toolbox

Extended Toolbox

My first new design, the toolbox, got a fairly good reception on the Origami forum at Flickr. I have created a crease pattern for it.

I tried to extend the toolbox to get different compartments, and here is the result. Unfortunately the corners become open, which makes it not very practical. Still, I am hoping that someone can take it up and fix it.


Pleated Bangles from Junk Mail

This is a traditional design using pleating again. The pleating is done diagonally on a square, resulting in the nice pattern. Once the pleating is done, the two central pleats are used, and the ends are looped around to lock the model.

Bowl

I had made a vase with this piece of banana paper before, and I decided to try and make a bowl using the same paper.

The design is to fold pleats in two directions, with the vertical ones being of equal size, and the horizontal ones overlapping. You then have to pull the outer pleat to the required angle, and press to make a new fold. This was folded completely freehand, which explains the odd shapes here and there.


Icosahedron

An Icosahedron is a regular polygon with 20 triangular faces. This model is made with 30 triangular edge units.

Video instructions here.


Ice Cream Cup, Folded

I liked the nice pattern on the cup, so I decided to make something out of it. I do similar things out of paper cups as well, which I need to post sometime.


Flea Market and Weekly Classes

I and my son packed up all the "upcycled" Origami that we had and set up a table at the Second to None Flea Market at Jaaga a couple of weeks back. We were there all afternoon, but sales were disappointing. But we learnt something about what people are likely to buy, and how much they would like to pay for Origami. People seemed to like the DNA model (double helix) which can be hung on a string to catch the wind, and boxes.

The weekly class is going to start from next week, at 6pm every Saturday, for 90 minutes. I hope to finish the 6 hours in 4 weeks.


Thursday 12 April 2012

Toolbox, another new design!


Toolbox 

Design by Krishna Panyam
From A4 (297mm x 210mm)
Final size: 100mm x 110mm x 110mm
Diagram not published.

I came up with this nice shape yesterday afternoon. I love designs which do not need a square, and can use the full A4 sheet. I think this will look nice with duo coloured paper,  so I am going to post a picture once I do it.


Origami at Summer Camps

I have been teaching a few children of ages ranging from 5 years up to 12 years. It is rewarding yet frustrating, as most of them just do not follow instructions! And usually these summer camps have so many kids that it take a long time going around the room and helping each one to finish a model. I need to research and find the right models for each age group.

I guess what keeps me going is the thought that some of these children are likely to get interested and will continue to learn Origami.


Friday 6 April 2012

Corrugations and more

Marble Wave or Birefrigence


The other side of Birefreigence
Marble Wave or Birefrigence
 
Crease Pattern published by Ray Schamp.

It can be seen as the intersection of two series of corrugations, one going radially, and the other one perpendicular to it.


Lightning Storm


Ray Schamp's photo stream on Flickr has many more interesting corrugations, such as this lightning storm!
And here is a much simpler model which is also very interesting. You can easily while away the hours playing with these corrugations!


Spherical Origami nº14


Design by Jun Mitani.
Folded from a single rectangle.
Diagram not published.

I saw this on Flickr a couple of weeks ago, and it fascinated me. Initially  it looked impossible, but knowing that someone has done it, and seeing a picture always spurs you on.

Of course a little knowledge of engineering drawing does help (hint: particularly intersection of two cylinders!)


More Corrugations

This is from a long rectangle (left over from making a square from an A4 sheet) pleated in 8, and a lot of 90º folds. For example, the corners are nothing but two 90º bends back to back.


4 Origami Hyperbolic Parabolas


This shape created by this model is sometimes called a "saddle".  The basic design is to take a square and fold alternating mountain and valley squares all the way to the center. 

This page shows more details of how to fold this.


When you collapse the model, it will no longer stay flat, and deforms into a hyperbolic shape (as you can see in the picture on the left), all the way into a straight line.
One more interesting feature of this model is that it can be "flipped", which is hard to explain in words.


In this case, I have taken a large square sheet (15x15 cm), divided it into 4 equal squares, and then folded the design on each of the 4 squares.


Here are a couple of other views of the model. The different shapes are created by flipping each of the 4 smaller squares .

The flipping of the smaller squares which are constrained by the fact that they are still joined to each other, creates all these variations.


Origami Classes


The first batch of the weekend Origami classes at Jaaga is getting over tomorrow, and I will restart them after a couple of weeks of break. Meanwhile, this being summer vacation time, I am teaching Origami at a couple of summer camps. There will be lots of kids, so I have to be really patient and well prepared.

***

Friday 23 March 2012

Honeycomb, and my own flower design?


Honeycomb Design

I saw this lovely honeycomb design on the Origami USA site (this site has lots of nice designs, but no diagrams) and I just had to try it myself! It looked complicated, but it was not too difficult to guess how to get started on it. And after a few hours of manic folding, including a trial run, here is the end result!

Design by Kenneth KawamuraPaper: Hexagon (32cm) cut from a sheet of banana paper (55cm x 67cm)
Final size: 14cm across
Folding time: 4 hours
Diagram: none


This it the bottom view of the honeycomb design. It is not as interesting as the top view, but you can get some more ideas about how the design works.

The design requires a hexagonal grid of 32x32x32, so I cheated and printed an A4 sheet with a grid generated from this very useful site.


Just to give you an idea of how much paper is used, of the 1536 small triangles in the grid, only 36 are visible (in the shape of 6 hexagons of 6 triangles each). The rest of the paper becomes vertical, wrapped around the hexagons in the nice spiral pattern.


Once I finished my trial with an A4 sheet, I had to find the right paper which was large enough, and could also take a lot of handling.

I decided to use a large sheet of banana paper which is very thin and crisp, and can handle lots of creasing. And this model does need lots of pre-creasing, so using the right kind of paper becomes more important.


My own Flower design?


(Krishna's?) Flower

Bottom of the flower
I came up with this design a couple of days ago while trying to reverse engineer another new design. I need to check if anyone can identify if something like this has been done before. Otherwise I can claim to be the designer, and possibly give it a name too! If you think of an appropriate name for this, tell me!


Paper: Square of colour copy paper (from A4)
Finished model: 7cm x 7cm x 6cm
Folding time: 10 minutes
Diagram: not yet!


Piramide Settima


Design by Francisco Guarnieri
Diagram here.

It is a clever design to convert four squares into a pyramid. You make one side of the square "disappear" by folding it on itself, resulting in a triangle.